
In music and audio production, studio acoustics are one of the most critical but often overlooked aspects. Whether you’re a budding musician recording your first demo or a seasoned producer crafting the next chart-topper, understanding and manipulating studio acoustics can make all the difference in achieving that pristine, professional sound.
In this guide, we’ll explore the world of studio acoustics and uncover the secrets to optimizing sound within your recording space.
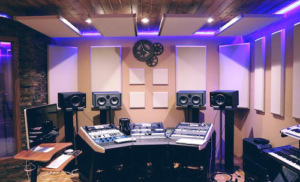
The Importance of Studio Acoustics
Before we dive into the nitty-gritty of optimizing studio acoustics, let’s understand why it matters. Acoustics refers to how sound behaves within an environment. A recording studio aims to capture sound accurately without unwanted reflections, echoes, or distortions. Poor studio acoustics can lead to muddied recordings, where instruments and vocals are not as clear or defined as they should be.
Imagine trying to paint a masterpiece with a brush that doesn’t hold its shape or constantly drips. Similarly, poor acoustics can blur the lines between sounds, making it challenging to create a crisp, polished final product. So, let’s explore how to overcome these challenges.
Understanding the Basics of Acoustics
To optimize studio acoustics, start by understanding some fundamental principles:
1. Absorption and Reflection
Sound waves can either be absorbed by materials, like acoustic panels, or reflected off surfaces, such as walls and ceilings. Striking the right balance between absorption and reflection is key.
2. Diffusion
Diffusers scatter sound waves, reducing the intensity of direct reflections. They’re particularly useful for creating a sense of space and preventing sound from becoming too flat.
3. Standing Waves
These resonant frequencies can cause peaks and nulls in your room’s response. Identifying and addressing them is crucial for achieving a balanced sound.
Optimizing Your Studio
Now that you’re familiar with the basics, let’s get practical:
1. Acoustic Treatment
Start by investing in quality acoustic treatment. Acoustic panels, bass traps, and diffusers can help you control sound reflections and absorb unwanted frequencies. Place them strategically around your studio to strike the right balance.
2. Room Layout
Consider the layout of your studio. Ideally, it should be symmetrical to prevent sound imbalances. Place your monitoring speakers at the right height and distance to create an equilateral triangle with your listening position.
3. Bass Management
Taming the low-end is often the biggest challenge. Experiment with bass traps in corners and use measurements to identify and address standing waves. A well-calibrated subwoofer can also help.
4. Monitor Placement
Position your studio monitors correctly. They should form an equilateral triangle with your ears and be isolated from their resting surface to reduce vibrations.
5. Soundproofing
If you’re recording in a shared space or trying to minimize external noise, consider soundproofing measures like resilient channel mounts, acoustic curtains, or sealing gaps in doors and windows.
6. Experiment and Test
Finally, don’t be afraid to experiment. Try moving your equipment and acoustic treatment around to find the best configuration for your specific space. Use measurement tools and software to analyze your room’s response and adjust accordingly.

To sum it up, optimizing studio acoustics is a journey, not a destination. It requires a keen ear, patience, and a willingness to adapt. If you’d like to learn more about this, meet us at Eclipse Studios. We’re the top Jacksonville recording studio,offering mixing and mastering services and a lot more.
Give us a call for more information.